Niche – Photo Organizing
This page may contain links to Amazon.com or other sites from which I may receive commission on purchases you make after clicking on such links. Read my full Disclosure Policy

We can focus our services on many different niches as Professional Organizers. One is photo organizing, both digital and print photos.
Organizing one’s photographs can seem an unsurmountable task, and many people put it off because they don’t know where to begin or how to sort their memories. This is where you can help!
If you want to add photo organizing to your repertoire of services, here is how you can approach the work with your clients or instruct them on the task by following the 5 Steps to Organizing method:
Step 1: Strategize – How to Begin
What are your goals?
- Why do you want to organize your photos?
- Do you want to create memory books for your children?
- Do you want to relive a memorable trip or event?
- Do you want to know what you have?
How do you want to preserve your photos?
- Do you want to create memory books (digital or print)?
- Do you want to scan them?
- Do you want to keep them in safe archival boxes?
Dedicate time
- Schedule time on your calendar right now to start
- Work in incremental blocks of time, such as two hours every Sunday afternoon
- Work while doing something else, such as watching a TV show, listening to a podcast, or audiobook.
Create a workspace
- Find a space in your home for working on the project
- Gather all your photos together
- Gather materials:
-
- One or two folding tables
- Chair
- Good lighting
- Recycle box
- Trash bag
- Photo safe pencil
- Boxes for sorting photos into
- Index cards and/or post-it notes for separating/labeling photos
Step 2: Prioritize
- As I suggest with any paper, start working with the most recent photos first.
- To avoid getting lost in the memories, work quickly. Do not spend time studying the photos at this point–just macro sort.
- Macro sort by decade or year, person, or event
- Separate the oversized photos
Edit
Within your macro-categories of year, person, or event, micro-sort the photos by:
- Photos for a memory book or album
- Photos for archive boxes
- Duplicates to give away
- Mystery photos to identify later
- Discard any duplicates or awful photos. If you find it difficult to discard pictures, give them to people who may appreciate them.
Steps 3 and 4: Localize and Containerize
- Choose the best photos for framing and where you would place them.
- Buy archival albums and boxes only when you are done prioritizing and editing, so you buy the right size and amount.
- Write on the back of loose photos information about the picture with a photo-safe pencil and contain it in temporary boxes to later be placed in memory books, archival boxes, or scanned.
- Store photos vertically and separately with an index card for each decade/year, person, or event.
- Contain negatives in acid-free archival envelopes. Write the date, name, and any other information on each envelope.
- Store all of your printed photos in a cool, dry location away from light
Step 5: Maximize
Think back to your goals for organizing your photos. What do you want to do with them now that they are prioritized and edited? Do you want to:
- Create memory books
- Scan and share with family and friends
- Contain and organize your photos in attractive archival boxes so you can thumb through and look at them when the mood strikes or pass them on to future generations.
Maintain
- As you print new photos, get them into your archival system immediately
- Not printing photos anymore? Your physical archival system categories can be mirrored digitally.
Want to talk to colleagues about different niches – or anything else?
Join the POPS Circle, where organizing and productivity professionals share ideas, experiences, and encouragement.


This is a great and helpful overview of the photo organizing project. I think the sheer volume of digital photos has made the whole experience feel quite overwhelming. People take so many, and then end up paying more and more to store them in the cloud. As with all organizing projects, decluttering is always a useful first step.
At the end of the day, this process should be at least somewhat pleasant. After all, the photos were taken to provide a happy memory, not to create a burden, so go at a consistent, but comfortable pace.
I can’t imagine it not being a pleasant experience! With that in mind, if it isn’t, maybe it’s just not the right time.
I love this easy, step-by-step guide to organizing photos for clients. I have done this in the past (years ago), and it was a great upsell option to offer my organizing clients. Thanks for sharing.
In the thirty-plus years I’ve been organizing, many clients have wanted to organize their photo collections. However, this is often not the first project they work on. It typically happens much later, after they have organized their physical space and daily systems. It’s more of a wish list item.
I like the process that was described here. Practical and not overwhelming. As Seana said, organizing photos has become more complicated due to the volume of digital photos people take.
But, as with everything else, if you focus on why you’re doing the project, the details of how become clearer. Establishing boundaries around what to keep and let go of is also helpful before you begin sorting.
I agree that organizing photos usually isn’t a top priority, unless someone needs help curating a collection for a special event. These guidelines are great, aren’t they?
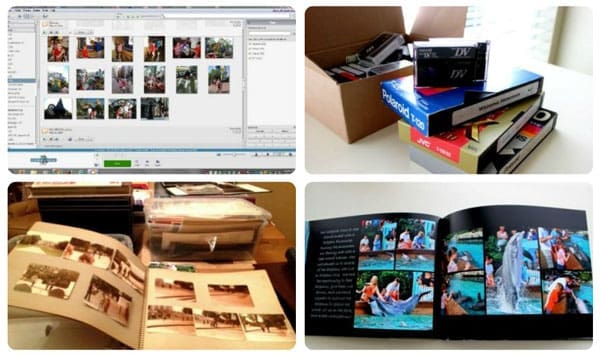
Everyone is (understandably) overwhelmed at the prospect of organizing photos. We’ve got prints and negatives and slides in the analog realm and then memory cards and thumb drives in the analog-for-digital realm, and then all of those photos on our phones and computers and cloud storage.
However, breaking it down like this gives people a better sense of how to move forward, one step at a time. And, of course, professional organizers who specialize in photo organizing can help, and can be found at NAPO and The Photo Organizers. I’ve still got 98% of my photos from 1967 through 2010 in prints and negatives, with everything since 2010 in digital, and getting it all organized, in one place, and backed up is a long process. The sooner we all begin, the better!
This is all stellar advice.
It’s definitely a long process! I finally got my backlog organized, so now when I take new photos or scan old ones, I can easily add them to my collection.